Thursday, December 22, 2011

Last Minute Gift Wrapping


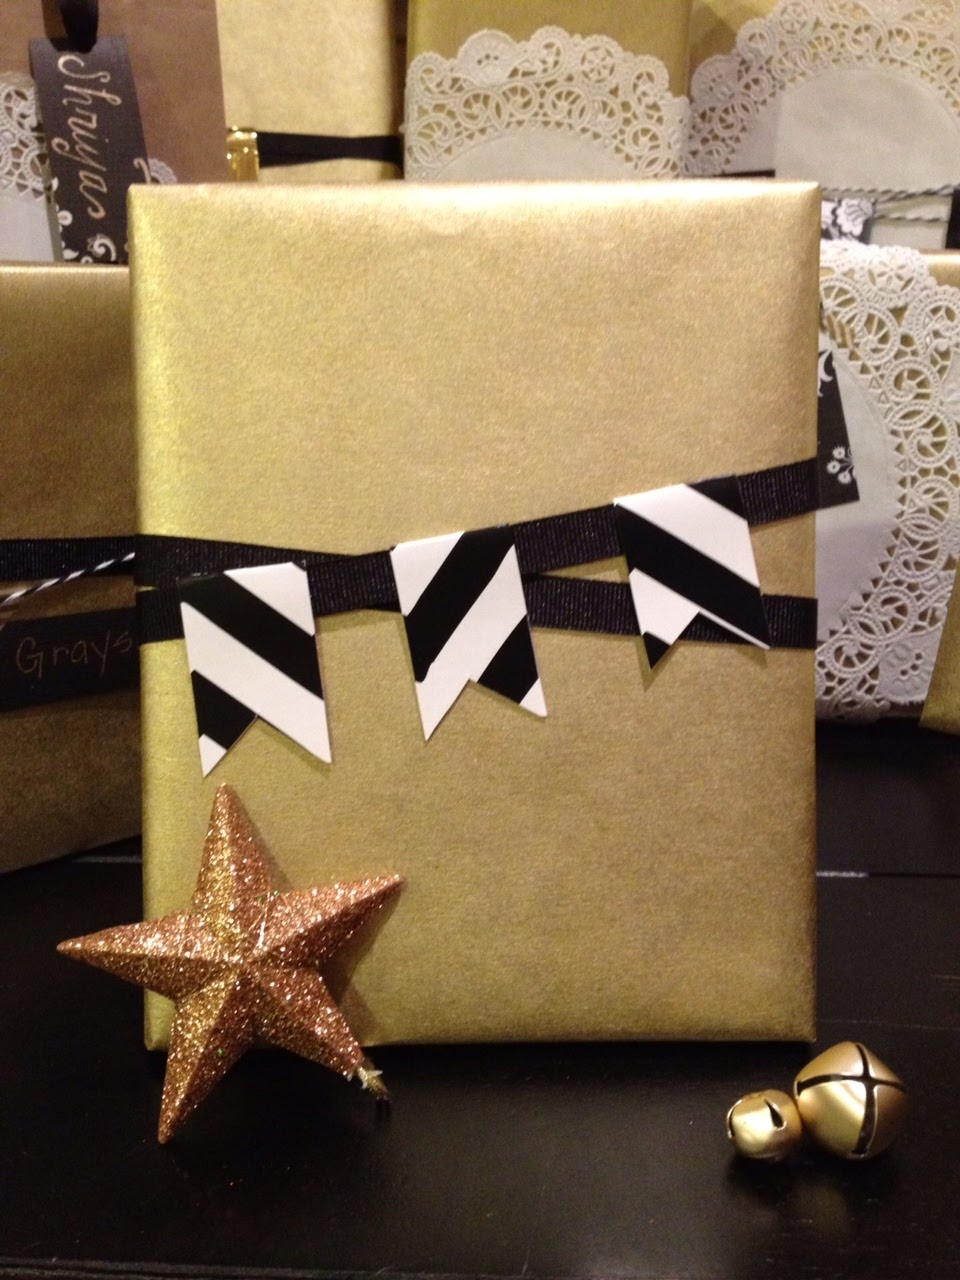
Every year I see georgeous gift wrap online with matching ribbon and embellishments. Every year I plan on buying it and having all our gifts perfectly coordinated and looking amazing under the tree. Well, it never quite happens and this year is no exception. So, I pulled out things from the craft closet (know as 'The Honeycomb Hideout') and got busy wrapping presents!


I got gold wrapping paper from Target and wrapped all the presents in that. For the guy presents I added black grosgrain ribbon and chevron striped paper that I cut out and folded in half over the ribbon to look like flags.


For the girl presents I added doilies that I had left over from a bridal shower we did. (Click here to see the other untraditional way we've used these same doilies.) I circled the gift in bakers twine and added grosgrain ribbon, washi tape and shiny gold vinyl. Each one was a little different but they all coordinated. I love that look!

Wednesday, December 21, 2011

Radiant Red Ikat Party on Hostess with the Mostess!

We were very honored to have our
Radiant Red Ikat Dinner Party featured on


See it on Hostess with the Mostess here.
See our blog post on this party here.

Cake Pop Tutorial: Prevent Cracks in Cake Pop Shells


One of the most frustrating and difficult issues to solve when making cake pops is cracking shells. If the cake ball is too cold, the shell cracks. If the cake ball is too warm, it falls of the stick when dipping. I did a fair amount of experimenting before getting a method that works for me. You may have to do the same but below is my go-to plan for a no-crack cake pop shell.
Why do cake pop shells crack anyway? As the cake ball warms up to room temperature it expands. If your candy melts shell hardens before the cake pop expands all the way then it will crack the shell. This means the cake ball can't be too cold and it helps if the candy melts are nice and warm so that they take longer to harden, leaving time for your cake ball to expand.

The main way I prevent cracking is to let the cake ball warm up a little bit after taking it out of the refrigerator and before dipping it. I find that whenever I put cake balls in the freezer, even for just 15 minutes I am more likely to get cracking. If you have time, put the cake balls in the refrigerator for a few hours to chill them.


I usually work with 3 cake balls out of the refrigerator at a time. I line them up and use the one closest to me first. I re-roll my cake balls just before I dip them to make sure they are perfectly round. This also helps me to feel if they are too cold to dip. They get a little softer and shiner and that's how I can tell they are ready to dip. As mentioned earlier warmer cake pops are more likely to fall off the stick so here's what I do to prevent that.

The MOST IMPORTANT thing to do is to use a plastic bowl to melt you candy melts. Even candy melts, which are made to melt, can overheat and become thick. Dipping the warm cake pop into a thick consistency will surely result in a dropped cake pop. Microwave the candy melts as directed on the package, just go slow and be patient. You may need to do 30 seconds at a time or even 30 seconds on defrost mode. My best results have been using a plastic bowl that stays almost completely cool to the touch even after microwaving.

Some non-plastic bowls will heat up (even with slow and careful microwaving) and overheat the candy melts resulting in a thick consistency. The ideal consistency is when the candy melts drip off the spoon after stirring.


After dipping the stick into the candy melts and then inserting into the cake ball, I then dunk the cake ball. Some people wait and let the candy melts set on the uncoated cake pop but I have not found this necessary.


After you dip a warmer cake pop, immediately return it upright to tap off the excess. On a warmer cake ball you may feel it start to fall off the stick if you tap it in one place too many times. Rotate the stick in your hand as you tap so the cake ball stays centered on the stick.


I used to tap the cake ball TONS of times to get every little last bit of candy melts off but on a warmer cake ball this could spell disaster. Now, I just use a clean finger or knife to wipe away an excess near the base of the candy melt to reduce the number of taps that I do.


I used this method to make 24 cake pops and not one of them had a cracked shell.


When I'm ready to do the next cake pop, I take one moreout of the fridge and put it in the spot farthest from me so it has time to warm up while I dip the two that are in front of it.
Please leave a comment or Facebook us with any cake pop questions or issues you are having and we will do our best to answer them!

See our other cake pop posts here and here.

Wednesday, December 7, 2011

DIY: Delicious & Simple Homemade Marshmallows


Don't you just love the look of homemade marshmallows? Cut into squares and dusted with powdered sugar, they look and taste so much better than their cylindrical grocery store cousins. Making them is probably easier than you think! I've never been a super hard core baker of things from scratch so when I say they're not too difficult to make, I mean it!

This DIY is based on a recipe from Joy of Baking


Homemade Marshmallows:
1 cup cold water, divided
3 - 1/4 ounce envelope unflavored gelatin
2 cups granulated white sugar
1 cup light corn syrup
1/4 teaspoon salt
2 teaspoons pure vanilla extract

Garnish:
4-5 cup confectioners' (powdered) sugar, sifted


Lightly butter, or spray with a non stick vegetable spray, the bottom of a 13x9x2-inch (33x23x5-cm) baking pan. Line the bottom of the pan with parchment paper. The vegetable spray helps the parchment paper stick to the pan more securely. Then sift about 3 tablespoons of confectioners' (powdered) sugar onto the bottom of the pan (this will help release the set marshmallow from the paper later on).


Place 1/2 cup cold water into the bowl of your electric mixer that is fitted with a whisk attachment. Sprinkle the gelatin over the water and let stand until gelatin softens, about 15 minutes.


Meanwhile, in a heavy two quart saucepan, place the sugar, corn syrup, salt, and remaining 1/2 cup cold water. Stir over medium heat until sugar dissolves and the mixture comes to a boil. Cover the saucepan with a lid and let boil for about three minutes to allow any sugar crystals to dissolve from the sides of the saucepan. Then the recipe says to remove the lid and attach a candy thermometer to the side of the pan. Increase heat to high and boil, without stirring, until the syrup reaches 240 degrees F, about 10 minutes. I don't have a candy thermometer so I just set a timer for 10 minutes and then removed the syrup from the heat and it turned out fine.


With mixer running at low speed, slowly pour the hot syrup into the gelatin mixture in a thin stream down the side of the bowl.


Gradually increase the speed to high and beat until mixture has tripled in volume and is very thick and stiff, about 10 minutes (looks like thick marshmallow cream). Add vanilla extract and beat to combine, about 30 seconds longer.


Scrape marshmallow mixture into the prepared pan and spread with a rubber spatula. To say that this mixture is sticky is an understatement so just smooth it out as best as you can. Dust the top of the marshmallow with another 3 tablespoons of confectioners' sugar and let stand, uncovered, at room temperature until set, about 12 hours.


Remove the marshmallow from the pan by first running a small sharp knife around the edge of the marshmallow to loosen it from the pan. Invert the pan onto a large cutting board that has been dusted with confectioners' sugar. You will have to use your fingers to help loosen the marshmallow from the pan. Peel off the parchment paper (the marshmallow will be sticky) and dust the top of the marshmallow with confectioners' sugar. 


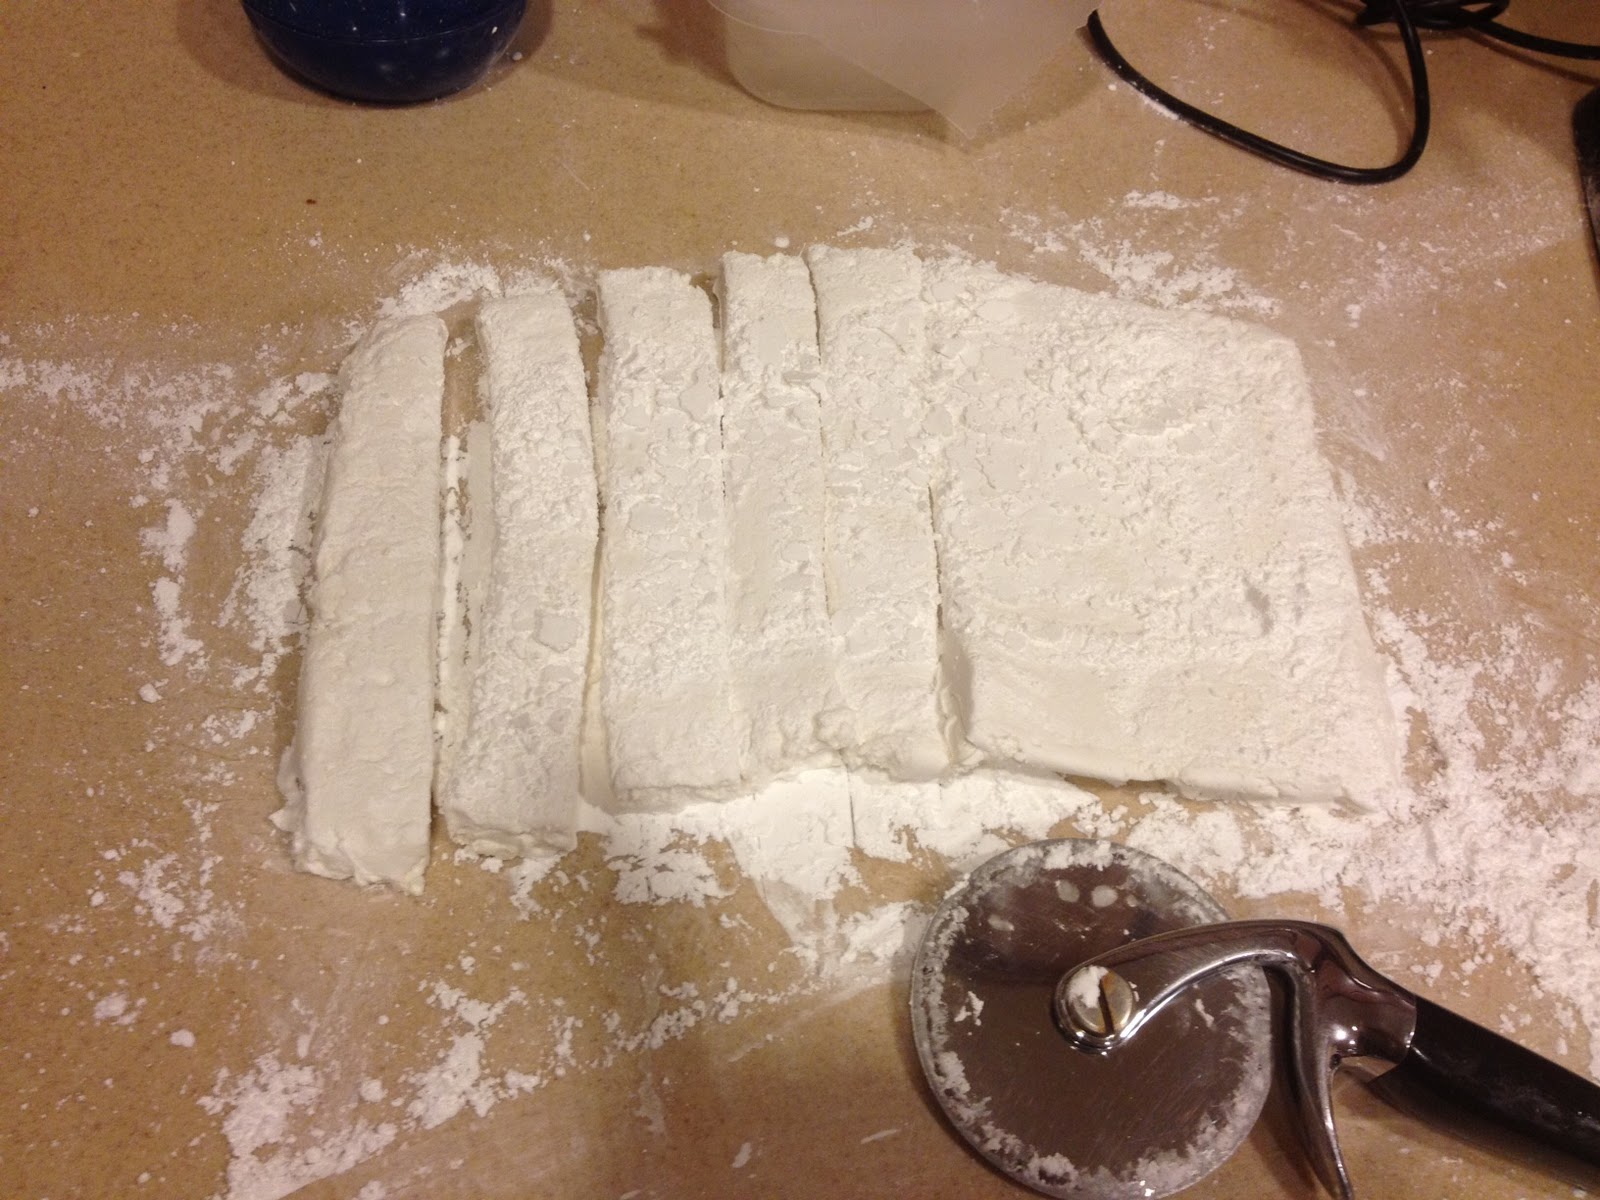
Cut the marshmallow into squares using clean kitchen scissors, a pizza roller or a sharp knife. Dip the cut sides of the marshmallows in additional confectioners' sugar. Shake off excess sugar and store the marshmallows in an airtight container, at room temperature, for up to two weeks.
Makes about 24 - 2 1/2 inch marshmallows.


Tuesday, December 6, 2011

Radiant Red Ikat Holiday


The inspiration for this holiday party came from the Ikat fabric featured on the wall behind the dessert table. Ikat is a dying process similar to tie-dye, but the threads are dyed before construction. This red and white repeating pattern was in the shape of a glass blown Christmas ornament. It had just the right touch of holiday color and modern, natural aesthetics.


We handmade the magnolia leaf wreaths and spray painted them lacquer white. If you follow our work long enough you'll see that there's nothing we won't spray paint! We found the red books at an antique store and some other pieces on this table were found at our favorite stores, West Elm and Crate & Barrel.


 We kept the color story easy and modern, but brought out the details in the textures, from the woven strands of the Persian fairy floss that adorned the pudding, the shredded flakes of the coconut cupcakes, down to the smooth and uniform petals of the succulents. Persian fairy floss also known as Pashmak proved harder to get than we thought. We tried to order from pariya.com and were told that they were temporarily unable to ship the the US. We weren't able to find any other US company who sold it. I turned to an etsy seller from the store iPashmak who didn't even have pashmak as an item at the store but agreed to make it for us! Thank goodness because it looked amazing on the milk pudding.


The ornamental Ikat reappears in paper with the name cards pinned to the backs of the dining chairs. A white lacquer branch and ribbon polish off this festive touch. These marvelous succulents bring in a soft sprinkle of green while the vibrant red peonies and gold candlelight radiate the warmth of the season.


Finding flowers for this table was another adventure. We didn't want the traditional look of roses but the only other "bushy" looking flower available in red were carnations. The florist we work with said that it's sad that carnations were seen as the "iceberg lettuce" of the flower world because she likes them. After a few unsuccessful trips to the San Francisco flower mart we decided to get silk flowers. We were nervous about how they would look they turned out great.


The real fun and whimsy of this party is found at the hot cocoa bar, where guests are invited to grab a mug of cocoa and customize it to their liking with caramels, whipped cream, toffee chips, homemade marshmallows, and chocolate and peppermint dipped spoons. A DIY for the homemade marshmallows is coming soon! All of this atop vintage board games that can be played while enjoying a one-of-a-kind chocolaty creation. The hearty succulents were so beautiful that we had to give them away as favors, so our friends and family could take a little bit of our holiday with them.

The beautiful invitation and all the tags and labels to create your own hot cocoa bar are available at our etsy shop.  Click here to see the printable collection!

Vendors & Credits
Event Design: Honeycomb Events & Design
Menu, Invitation and Printables: Honeycomb Events & Design Etsy Shop
Caramels: Iris Estell
Rock Candy: RockYourMouthGB
Wooden Sticks with Ball Ends:Wood Candy Sticks
Vintage Games: Penny Pickers
Persian Fairy Floss: iPashmak  

Sunday, December 4, 2011

DIY: Advent Calendar- Free Printables!

Get free printables for this adorable advent calendar project! Read below.


We love advent calendars, but there's so many things to think about when the holidays come around that by the time you want to create one, Christmas is next week. Better late than never we say! We created this variation on an Advent Calendar for Jennifer's daughter Arden.


1. It's hard to find small muslin or simple cloth bags last minute. So, when you can't find your own, make them! We found these inexpensive ivory colored napkins with a nice hem. With a little simple sewing, they'd be nice bags in no time.
2. This option of making your own bags gives you more creativity in picking thread colors and patterns.
3. We cut the napkin in fourths and sewed the side and back together to create a perfect little pouch. 


4. We created these mod designs in Illustrator using a warm red, mint green, and charcoal gray, making sure never to mix the red and green together on the same design.

5. Get at least six iron-on transfer sheets. When you get your sheets home, find out whether you need to reverse the image or not. The same brand of iron-ons will sell both, and you want to avoid that unfortunate mistake. As you can see, I reversed mine.


6. Iron-ons are simple enough in theory, but with this project, they were a pain. Follow the instructions on the iron-on packaging, but we found that lots of pressure on a medium heat, no steam, for about 30 seconds does the trick. Let it completely cool before removing the backing.
7. And then... beautiful!


We had so much fun decorating the clothespins! For the silver striped clothespin we used Japanese masking tape also known as Washi Tape. It is so fun to decorate with beacause it has a velum like quality. We also lined the clothes pin with double sided tape and then applied 3/8" ribbon on it.


If you want a super quick way to use this project just print out the numbers and glue them onto paper sacks or brown paper lunch bags and you'll have an advent calendar by tonight! We filled ours with little treats and treasures from the $1 bin at Target.

To get these free printables just become a follower of our blog then email or facebook us with your email address and we will email them to you!
info@honeycomb-events.com

 Enjoy and Merry Christmas!


Wednesday, November 30, 2011

More Cake Pops Please!

Our first post on cake pops has been our most popular blog post by a mile! We have made a ton more cake pops since then so we thought we'd share our latest
cake pop creations!

Clown and other whimsical cake pops created for a
carnival party. See the entire party here!


We added royal icing transfers to dress up these cake pops for this super hero birthday party.


Minnie and Mickey Mouse cake pops for a lucky little girl's birthday party. See the huge dessert table and
party details here!


Anchor shaped molds were used to decorate these cake pops for a vintage style nautical baby shower.


How adorable are these strawberry cake pops? Placing them in strawberry baskets took the cutness level over the top! These were made for this retirement party.


We don't often do upside down cake pops but we thought they would look great on top of two lighted square vases. See all the pictures from this party here.


Here are our owl cake pops on a branch shaped from fondant. See these cake pops in the dessert table we created for a baby shower that was featured on Amy Atlas!

Thursday, November 17, 2011

DIY: Cupcakes in a Jar

Cupcake in a jar is a creative way to serve cupcakes and it's a lot more portable! Just be warned, it takes a TON of frosting! About twice as much frosting as a regular cupcake. These cupcakes in a jar were made using a 1 pint "jelly jar" size mason jar.


1  When you make the cupcakes, don't use liners. This way you won't have ridges when you place the cupcake in the mason jars. I used Cake Release by Wiltonin the cupcake pan but you could also use cooking spray.

2  Use an ice cream scooper to fill your cupcake pan with batter! The spring release action makes it easier and with a lot less mess! Fill each cupcake resevoir 3/4 full so you get a nice dome when they are baked. You'll need a more substantial cupcake to fill the jar nicely.


3  Extra large pastry tips are popular right now because they give a modern look. For this dessert I used an extra large frenchh pastry tip from etsy seller, Sweet Estelle.

4 & 5  This pastry tip is too big for the standard coupler so I cut the tip of a Wilton plastic decorator bag and put the pastry tip inside the bag.


6  Use a tall glass to hold up your pastry bag so you can fill it more easily. I even fold the ends around the top of the glass to get the frosting down in farther.

7  Once you have the frosting in the bag, squeeze it down into the pastry tip.


8  Cut your cupcake in half as shown. You'll have a top half and a bottom half.

9  I placed the top half in the jar first, so that it's at the bottom. Put the flat side of the cupcake down and the dome side of the cupcake up. The flat bottom of the cupcake looks best against the flat bottom of the jar.

10  Add a ring of frosting around the cupcake half that you just added. To save frosting you can just do an outside ring of frosting and not fill in the middle. Then place the other half of the cupcake in the jar. Top off with more frosting and voila! You have a beautiful party favor or fun treat for your guests!


Tie a wooden spoon around the jar with a cute ribbon or twine for an adorable look.
We got our wooden spoons from etsy seller Sucre & Spice.


We made these cupcakes for our Modern Faux Bois Owl Dessert Table.

You can also purchase the Printables.

PageList1