Wednesday, November 16, 2011
Rustic Faux-Bois & Owl Dessert Table as seen on Amy Atlas
We're so thankful to Amy Atlas for featuring our dessert table on her blog! What a great compliment and a fabulous showcase for this gorgeousness!
This dessert table was created for a second time mom who wanted the gender of the baby to be a surprise. We thought, let's go neutral and embrace the season with a rustic modern dessert table! We designed our own chic owl illustration and all of the custom printables in the fall color scheme. Combine these with some fabulous modern and woodland pieces and it gives the table a lot of warmth and charm.
We wanted to use burlap in a refined way. Paired with some grosgrain ribbon and the mom-to-be's initials, it makes a darling cupcake topper.
We brought in a striking pop of color and a taste of fall with fig tartlets on a mossy green bed.
We also made the owl cake pops and put them on a branch formed from fondant.
Each guest took home a cupcake in a mason jar with their own wooden spoon. "It's been a Hoot!"
We even designed the custom invitations!
This dessert table was designed and styled by Honeycomb Events & Design. We also made the cupcakes, cake pops and tartlets as well as photographed the table.
Want to throw your own Rustic Faux Bois & Owl Baby Shower? You can purchase the Printables.
Labels:
baby shower,
brown,
burlap,
cake pops,
Cupcakes,
earthy,
modern,
nature,
owl,
Pictures,
printables,
rustic,
wood
Friday, November 11, 2011
Honeycomb to the Rescue!
This super hero party journey began with a particulary wonderful client of ours who has a son that loves comic books, Green Lantern in particular. With the movie's release this past summer, there was no shortage of themed paraphernalia flooding the marketplace. We wanted to make things unique and not something you could buy in a store so we went in a different direction. Let's make it old school, keep it rooted in the comics, and give it some real retro styling.
Our client loves to go big, inviting the entire neighborhood, so it's always, "I love it, now I want a hundred." Planning for over 300 individual pieces of dessert, and over 100 props can get overwhelming, but we're getting good at making spreadsheets and delegating our time. At least we think we are.
Designing the invitations for the party solidified our goal of creating a super hero party that harkened back to another time. This invitation resembled WWII military recruitment posters. The hexagon pattern and sharp rays of light will be themes repeated throughout other custom made printables and labels.
First, we thought that our birthday boy should have his own comic book to give out to his friends as a favor. We teamed up with a great graphic artist on Etsy, provided him with the storyline, pictures of the birthday boy, Christian, and shots of the neighborhood. Just two weeks later and we had the finished product, a personalized comic featuring Christian as the newest Green Lantern. Christian was showing it off to all his friends, and so were we.
The use of fabric really elevated our dessert table destination. In addition to layering our tablecloths on the different levels, we created a canopy style top and curtains on the side of our space mimicking rays of green light, framing our dessert tables. The custom painted skyline on our fabric backdrop completed the feast for the eyes. Top it off with a custom-made, three-dimensional, 18-inch high green lantern symbol that actually glowed. For the desserts, we went back to our (and our client's) favorites: designer cake pops, cream cheese frosted cupcakes, and candy coated popcorn to name just a few. The dessert table set-up was modified to showcase layers and levels of different desserts. Because of this design, there was less space for the ever increasing number of desserts we were bringing. We gave the edible works of art their deserved breathing room. We kept the table clean and organized by highlighting only a dozen of each dessert and refilling throughout the afternoon. The cake pops were decorated with royal icing transfers of Green Lantern masks and the Green Lantern logo. Oreos were dipped in white chocolate and then we cut out the Green Lantern logo from green Wilton sugar sheets and placed them on the Oreos.
The favors were starting to take shape: the amazing customized comic, personalized party blowers, and now something to satisfy the children's sweet tooth. We pitched the idea of the cupcake push pop to our client and she loved it. This was going to be our "wow" item. The clear push pop tube that surrounds the cupcake screams out for decoration. We turned our little push pops into mini Green Lanterns, donning a uniform and mask, complete with cut-out eyes and lantern symbol. For the uniform and mask, we made our own stickers. Your local print shop can print on more than just paper. These are vinyl adhesives. The sophisticated printer that created these, can also cut out the intricate designs, eliminating hours of tedious labor. Isn't technology amazing? Now that we knew what was going into the favors, what exactly were they going into? Initially we thought of a tube or cylinder design. The comic and push pop would fit nicely into that. Jennifer expanded on that idea and found these great clear plastic paint cans. When it came time to decorate the cans, Jeff had an epiphany. The cans have a handle just like the "lantern" the Green Lantern uses. We could turn the kid's favor container into their own take home lantern! Our favorite new medium came into play again. The vinyl adhesive would wrap around the bottom half of the can transforming it into a wonderful keepsake lantern.
Any party would not be complete without a photo booth area. And since we're in comic book land, every guest needs to showcase a feathered fedora, styrofoam barbell, and birthday wishes speech bubble.
For the dining tables, we created a city scape centerpiece using boxes wrapped in colored paper, and went back to our wonderful vinyl adhesives for miniature windows and doors. To complete the look, we added yellow strips to our marbled gray table runner, literally creating a "road runner" underneath our mini skyline. Too cute for words!
All was set for a spectacular, fun filled day. As the children arrived we gave them their very own ring and mask, since we wanted them to enjoy those items during the whole party. Christian had a blast playing with his friends in the giant mobile game truck, and the adults marveled over all the details, and delicious desserts. Many of them finding it hard to believe that we do it all ourselves, and yes, believe it folks, we did it all ourselves.
Vendors & Credits
Event Design: Honeycomb Events & Design
Cake pops, decorated cookies, dipped oreos, fondant cupcake toppers and all other desserts: Honeycomb Events & Design
Invitation, Printables and Printed Signs: Honeycomb Events & Design
Local Printer: Cole Print & Marketing, Concord, CA
Custom Linen Creation: Honeycomb Events & Design
Green & Black Paper Straws: etsy seller 'domesticcharm'
Green Cupcake Liners: etsy seller 'sweettreatsupplies'
Plastic Push Pop Containers: etsy seller 'craigjen'
Comic Book Illustration: Stephen Thornton, etsy seller name 'comicgenius'
Clear Plastic Paint Can: purchased at Michaels
Wednesday, October 19, 2011
Sweetheart Anniversary
http://www.100layercake.com/blog/2011/09/23/modern-sparkle-party-inspiration/
Materials needed:
30 bulb strand of lights (Cost Plus World Market) They have lots of varieties, we went with frosted white, but they also come in a wide array of colors.
Black foam core board
Wrapping paper
Exacto knife
16 feet of ribbon
Instructions:
1. Draw out design on back of foam core board, then mark every four or five inches where each bulb is supposed to go, making sure every bulb is used.
2. Use the exacto knife to cut out holes that are the size of the screw threads on the light bulb, no bigger.
3. Plan out the path of the bulbs in your design, so you don't back track and run out of wire length. This is particularly important if you are using two boards with one strand of lights.
4. Unscrew first bulb, placing the socket on the back side of your first hole. Re-screw in bulb with foam core board sandwiched in between the socket and bulb.
5. You have to tighten the bulb extremely tight in order to make full contact with the socket or else it won't light.
6. Repeat until all the lights are screwed into their sockets through the foam core board.
7. Decorate with paper and hang with ribbon.
8. Congratulations, you've created a beautiful one-of-a-kind sign that everyone will be asking you about.
Wednesday, October 5, 2011
Wise Young Owl
This is the start to our new Owl baby shower. Rustic, earthy, and too cute for the wise old owl. The full party in all it's flying glory will make it's debut in November.
Thursday, September 29, 2011
Lavishly Luxe
Hello Kitty cake pops are all the rage, nothing new there. We were happy to provide them for a client who wanted them for her birthday celebration at the fabulous New Parish in Oakland. But how do we reinvent the wheel? We've done Hello Kitty before, to rave reviews no less. How do we make this Hello Kitty theme feel special, unique, fresh? When all else fails, go glam, and go glam hard. Our client loves pink and gold, and surprisingly it's a great color combination. The quiet, feminine undertones of pink mixed with the bold, opulence, and glitter of gold gave us a new creation that was more than just a sum of it's parts.
The tissue balls gave the table some nice height and visual interest. They're easy to make, once you get the hang of it. Chocolate covered strawberries were requested by the client, and fit nicely with the rest of the table.
The Hello Kitty cake pops were front and center in our tasting cups. The chocolate covered pringles are always a crowd favorite. There's something about the crunch mixed with the salty/sweet tastes that are irresistible. Several other treats in pink and gold added to the luxe appeal.
This overhead view shows the great gold leaf patterned paper along with the custom made table runner.
This table, more so than others, displayed the intricate details and layering of custom printables. There's nothing like a lot of elbow grease to make a small table feel like a million bucks.
The tissue balls gave the table some nice height and visual interest. They're easy to make, once you get the hang of it. Chocolate covered strawberries were requested by the client, and fit nicely with the rest of the table.
The Hello Kitty cake pops were front and center in our tasting cups. The chocolate covered pringles are always a crowd favorite. There's something about the crunch mixed with the salty/sweet tastes that are irresistible. Several other treats in pink and gold added to the luxe appeal.
This overhead view shows the great gold leaf patterned paper along with the custom made table runner.
This table, more so than others, displayed the intricate details and layering of custom printables. There's nothing like a lot of elbow grease to make a small table feel like a million bucks.
Wednesday, September 21, 2011
The House of Minnie Mouse
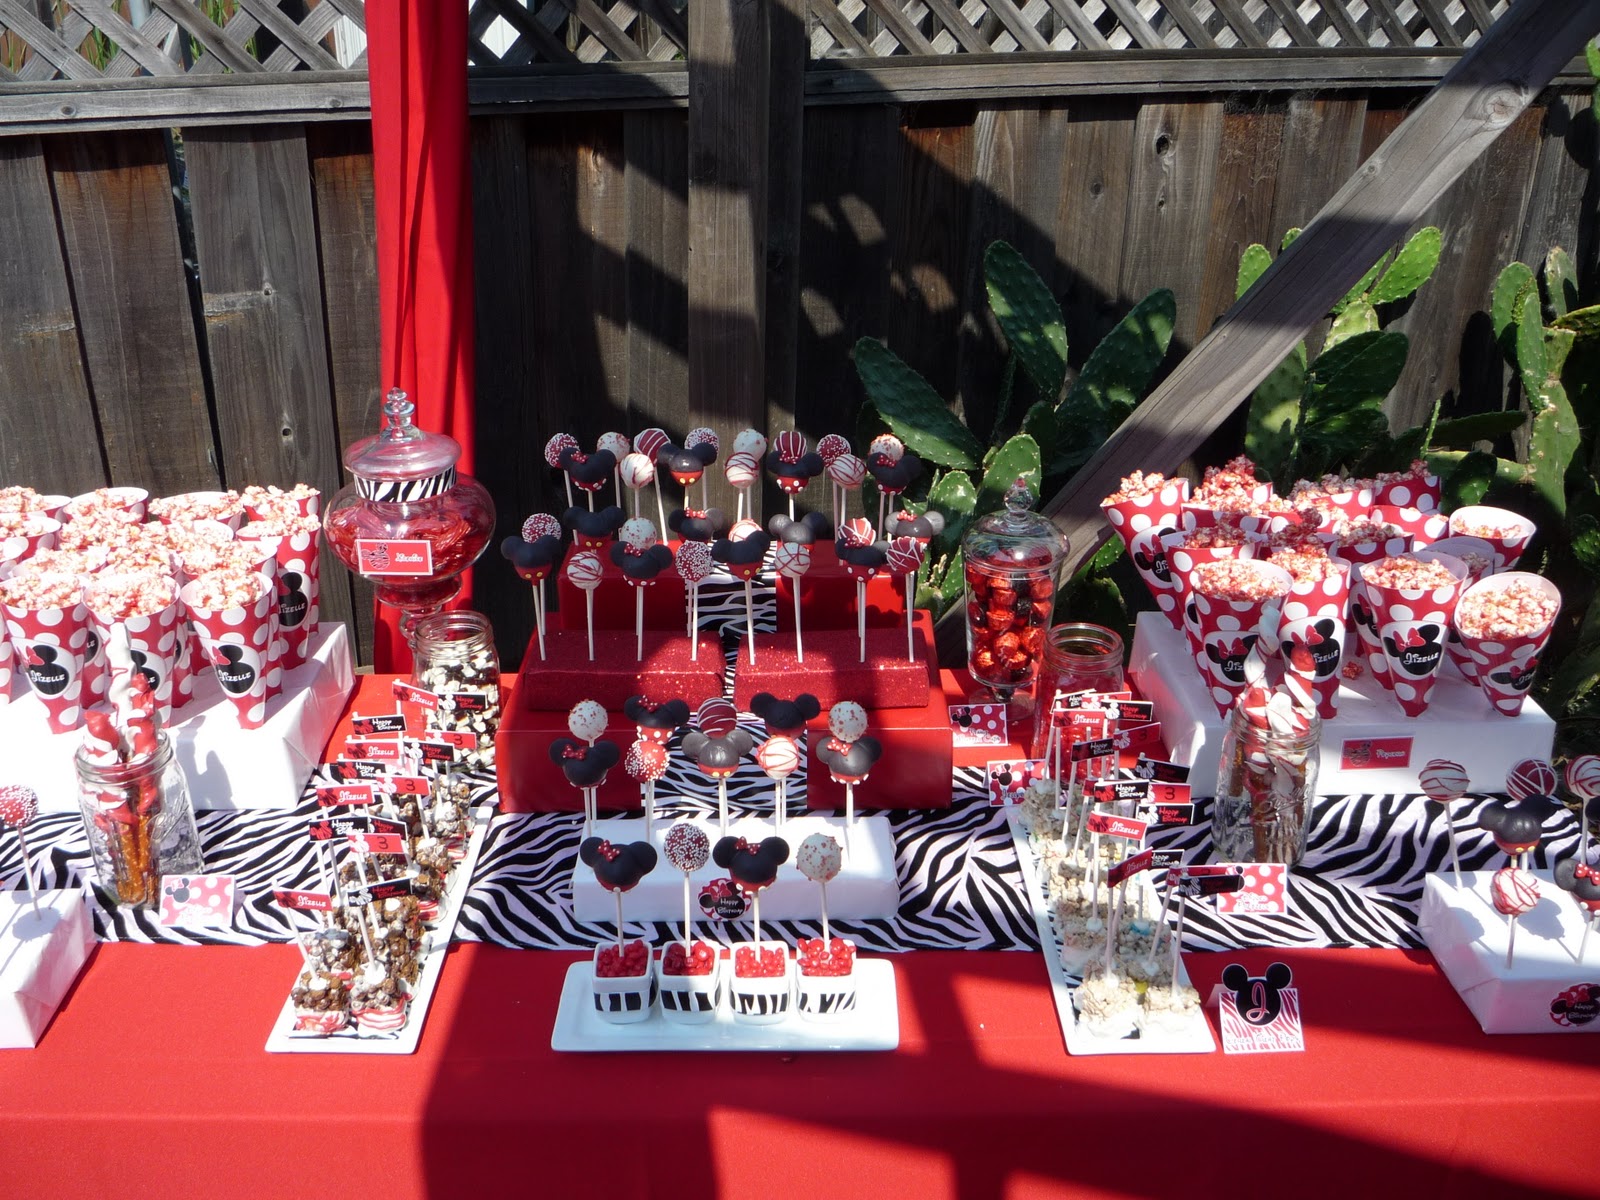
One of our biggest challenges to date. Transform a backyard into a Disney paradise. Our client wanted a very large assortment of goodies for her daughter's 3rd birthday party. We needed three full size tables just to accommodate all the desserts.
The head table featured our zebra cupcakes, rice krispie pops, enormous Mickey and Minnie cookies, chocolate dipped Mickey oreos, chocolate drizzled popcorn and fudge dipped caramel pretzels. Let the sugar coma commence!
Look at those cookies! Jennifer painstakingly created these sugar cookies. That frosting is flawless. Also, check out the pop out ears on the food labels, adorable.
The second table featured our candy confections. More of the incredibly popular and delicious popcorn and fudge covered, caramel pretzels. Our cake pops are always a show stopper. I'm not sure what you would call these, but incredible works of art, is a start. Jennifer raised the bar with the Mickey and Minnie versions.
Our client also wanted other cereals turned into marshmallow pops, like cocoa puffs and Lucky charms.
All the children loved our candy buffet. More licorice, gummi bears, and jelly beans than they could handle.
The third table polished off the wonderful decadance. What better way to finish off a party than with milk and cookies. Each child got their own bottle of milk with decorated straw.
We added balloons in the theme colors of black, white, and red and theme patterns, polka dot and zebra print to fence posts as well as create these custom table centerpieces.
Monday, September 12, 2011
A Dog Gone Good Time
A good friend of ours was throwing a birthday party for her daughter. She wanted it to feature their beloved yellow lab, Pedro. We weren't able to be there in person, but sent along a printables collection designed especially for them.
Cupcake toppers and wrappers. Jeff drew a picture of Pedro and used it as one of the party logos.
Favor tags with every guests name.
Tents, labels, and patterned papers. Collection available on Etsy.
The real Pedro and his digital likeness.
Thursday, September 8, 2011
Pretty in Hot Pink
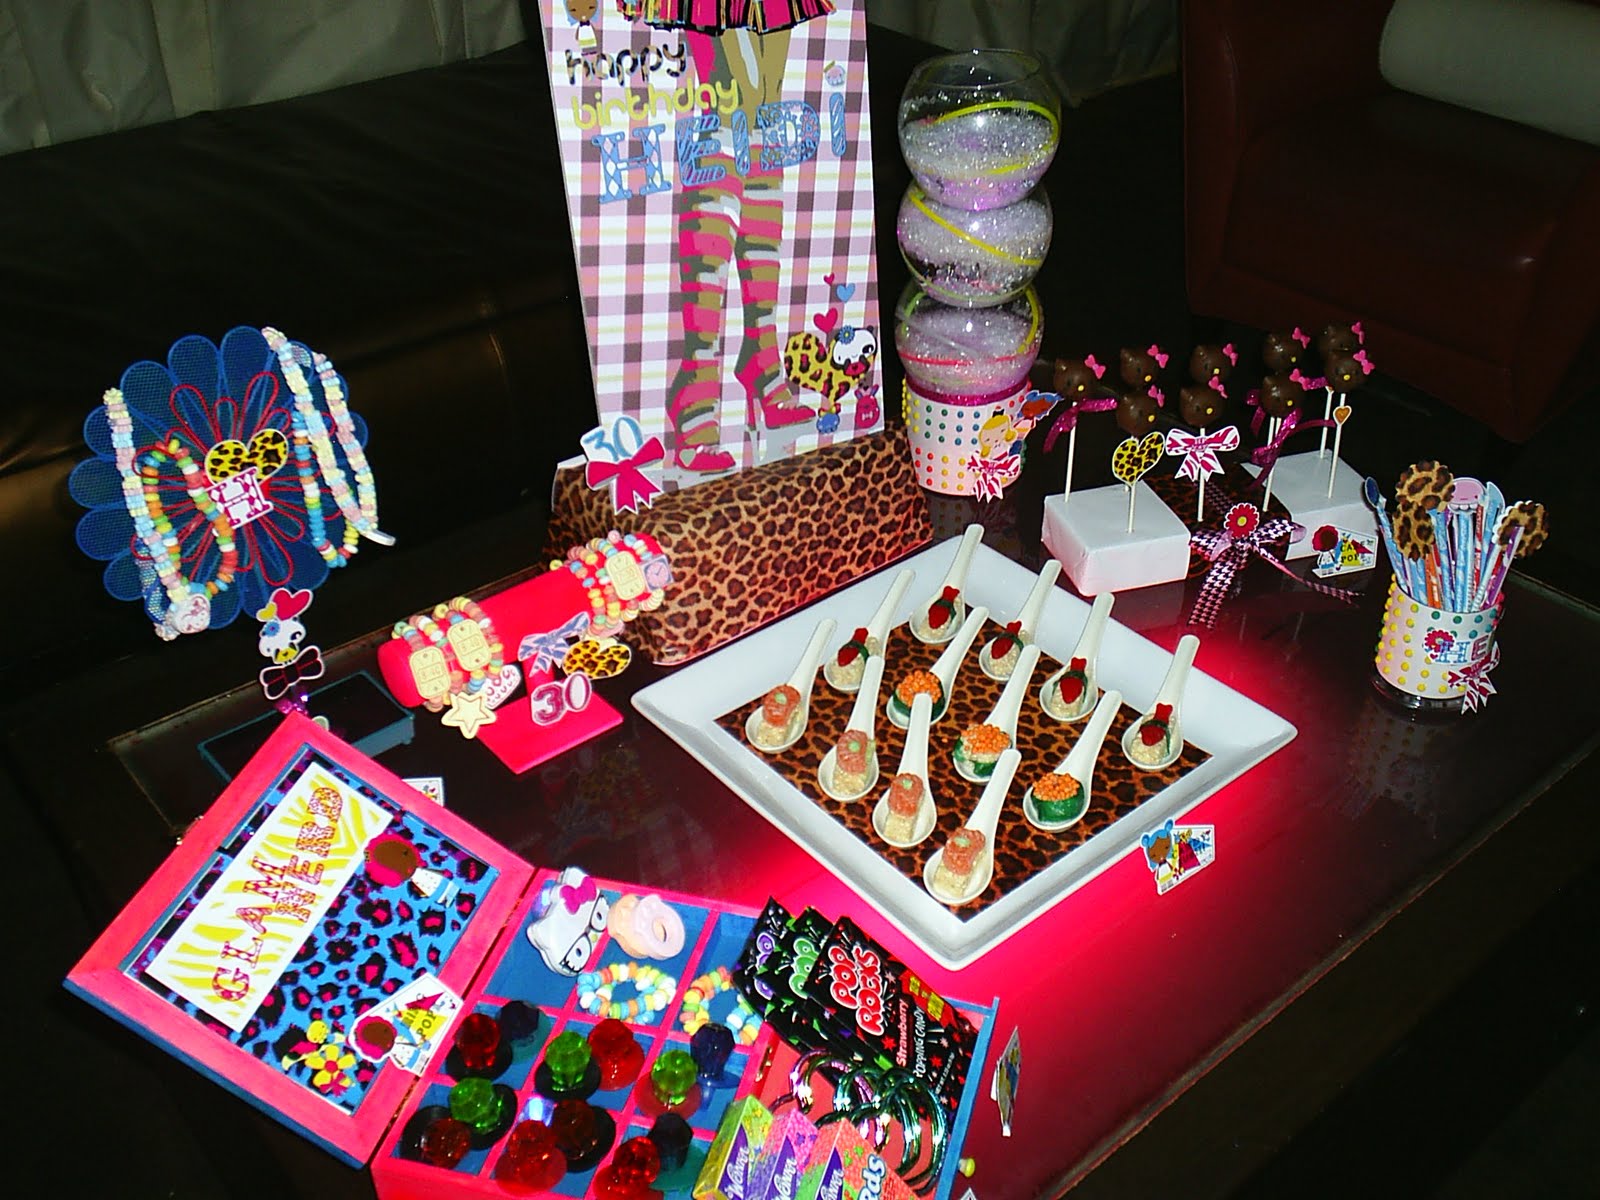
Our client was turning the big 3-0. She loves Hello Kitty and cheetah print, and didn't want the party to be too serious or "adult". We thought a harajuku theme would fit the bill. It's young, playful, and modern. It's as if Nicki Minaj and Gwen Stefani had a love child and that love child had a sweet tooth.
We got to bring out our candy sushi again. Such a huge hit. Modern kokeshi doll labels include all the cute little creatures.
The table became our little candy store. We fused fashion with sweets: ring pops, candy necklaces, and even candy watches!
Hello Kitty cake pops, cheetah print, candy dot wrapped vases, lots of hot pink bows, and glow necklaces.
A closer look at those cute candy watches, plus look out for the Hello Kitty in glasses.
Yes, the table was glowing pink!
Subscribe to:
Posts (Atom)